

Japanese Knife Sharpening Guide - Which Whetstones and Accessories Do You Actually Need?
Buying a good Japanese knife is often the easy part. The confusion starts when you decide to sharpen it yourself and suddenly encounter 220, 400, 800, 1000, 3000, 6000 and 10000 grit stones, soaking stones, splash-and-go stones, diamond plates, nagura, strops, holders and angle guides.
The first thing to understand is that most home users do not need a large sharpening system. For an ordinarily dull kitchen knife, one good stone around 800-1000 grit, a stable sharpening surface and a reliable way to keep the stone flat can already produce an excellent working edge.
More equipment should solve a specific problem. A coarse stone should repair damage or reset geometry. A finer stone should add a finish you actually want. A flattening tool should maintain the stone. A strop should refine an edge that has already been sharpened properly.
The goal is not to own every grit. It is to understand what condition the edge is in and what the next abrasive step actually needs to accomplish.
Which grit do you actually need?
800-1000 grit: the main sharpening stone for a normally dull kitchen knife. If you buy only one stone, start here.
120-400 grit: repairs, chips, damaged tips, bevel changes, very dull edges and thinning. Do not start this coarse for routine sharpening without a reason.
2000-3000 grit: an excellent practical finish for Gyuto, Santoku and most general kitchen work. Smoother than 1000 while retaining useful bite.
5000-6000 grit: more useful for slicers, fine meat or fish work and users who deliberately want a more polished edge.
8000-12000+ grit: specialist finishing territory. It is not a compulsory final stage for every Japanese knife.
Does your knife actually need sharpening?
Before choosing a stone, diagnose the edge. A knife does not need full sharpening simply because it no longer feels exactly as aggressive as it did after the previous session.
Use food you know well. If a clean edge starts sliding across tomato skin, crushes herbs instead of slicing them cleanly or requires noticeably more pressure to enter an onion, the edge probably needs attention. A very lightly tired edge may respond to a few controlled passes on a strop or a quick touch-up; if that no longer restores the cutting behaviour, it is time to return to a stone.
Paper is useful because it lets you check the whole cutting edge from heel to tip. Snagging, tearing or hesitation can reveal inconsistent sections. But food usually tells us more about kitchen performance than paper does.
Why the tomato test tells you something paper cannot
Tomato skin is smooth and elastic. The edge needs enough bite to enter it immediately without excessive downward force. A highly polished edge can slice printer paper cleanly and still hesitate on a tomato, while a properly finished kitchen edge bites almost as soon as it touches the skin.
The test also shows whether the blade is cutting or crushing. Onion skin, herbs and scallions can reveal similar problems during normal cooking.
Sharpness tests should answer practical questions. There is very little value in chasing a spectacular paper-cutting trick if the knife no longer behaves the way you want on food.
Normal dulling feels different from edge damage
Ordinary dulling usually develops gradually and relatively evenly. The knife starts requiring more pressure over much of its edge, but there is no single dramatic fault.
A chip, rolled section or damaged tip creates something more local: a catch, skip or sudden change in resistance at one point. You can often feel it clearly on meat, herbs or scallions.
This distinction matters because a dull knife and a damaged knife may require very different starting stones. A normally dull knife rarely needs the steel removal of a 220 or 320 grit abrasive.
How often should a Japanese knife be sharpened?
There is no useful fixed calendar. One home cook may need a full sharpening every few months; another may sharpen only once or twice a year. Professional use compresses the same wear into far less time, so a working chef may touch up the edge regularly and fully sharpen every few weeks.
The useful trigger is a change in cutting performance. When you noticeably increase pressure and a light maintenance step no longer brings the edge back, it is time for proper sharpening.
The knife should determine the schedule, not the date in your calendar.
What makes a knife dull faster?
The sharpening interval is affected by far more than steel. High cutting volume obviously increases wear, but the cutting board, edge geometry and technique can make an equally large difference.
Very hard boards, scraping ingredients with the cutting edge, twisting the knife in dense products, excessive pressure and regularly contacting very hard ingredients all shorten the useful life of the edge. A fine, thin edge can cut beautifully but may also lose its ideal characteristics faster if the technique is rough.
Steel and heat treatment influence how the edge wears, yet a good cutting board and clean technique can change the maintenance cycle more than many owners expect.
Honing, stropping, touch-up and full sharpening are different jobs
These terms are often mixed together, but they describe different levels of maintenance.
Stropping uses a softer surface, plain or loaded with abrasive compound, to refine an edge that is already reasonably sharp and remove small remnants of burr.
A ceramic or diamond honing rod can lightly abrade and refresh the edge. Ceramic is usually the gentler option, while diamond rods remove material more aggressively.
A touch-up means using a fine or medium-fine stone for a small amount of controlled work before the knife becomes seriously dull.
Full sharpening means rebuilding a continuous apex, usually on a medium stone, working the complete edge and then removing the burr properly.

Strop or honing rod?
For light maintenance, we generally start with the least aggressive option. If the edge is only slightly tired, a few careful passes on a strop may be enough. If more refreshment is needed, a fine ceramic rod can make sense.
A diamond rod removes steel faster and can be useful when more abrasion is actually required, but that also makes it easier to overdo the process. Very thin, hard Japanese edges should always be treated with controlled pressure regardless of the maintenance tool.
The important part is to recognise when maintenance stops working. A strop or rod should not become a way of postponing proper stone sharpening indefinitely.
What does the grit number actually mean?
Grit is a classification of abrasive particle size, but the number is not one perfectly universal measurement across every maker and standard.
In practical sharpening terms, lower numbers usually remove steel more aggressively and leave a deeper scratch pattern. Higher numbers remove less material and progressively refine the surface left by the previous abrasive.
The logic is similar to sandpaper. A coarse abrasive is useful when material genuinely needs to disappear quickly, not simply because coarse stones exist.
| Approx. grit | Typical job | Do most home users need it? |
|---|---|---|
| 120-400 | Repair, chips, tips, bevel setting, thinning | Only when there is a real repair or geometry job |
| 800-1000 | Normal sharpening and apex formation | Yes - this is the core home range |
| 2000-3000 | Working refinement while retaining bite | Useful, but not essential |
| 5000-6000 | Slicers, fish, cleaner draw cuts, more polished edges | Only if the knife and task benefit from it |
| 8000-12000+ | Specialist polishing and selected single-bevel work | No - specialist territory |
When do you genuinely need a coarse 120-400 grit stone?
Use one when meaningful material needs to be removed: a chip, broken or badly rounded tip, very dull edge that needs a new bevel, an angle change or thinning behind the edge.
A coarse abrasive can also save a huge amount of time if a 1000 grit stone would need an excessively long session to reach fresh steel.
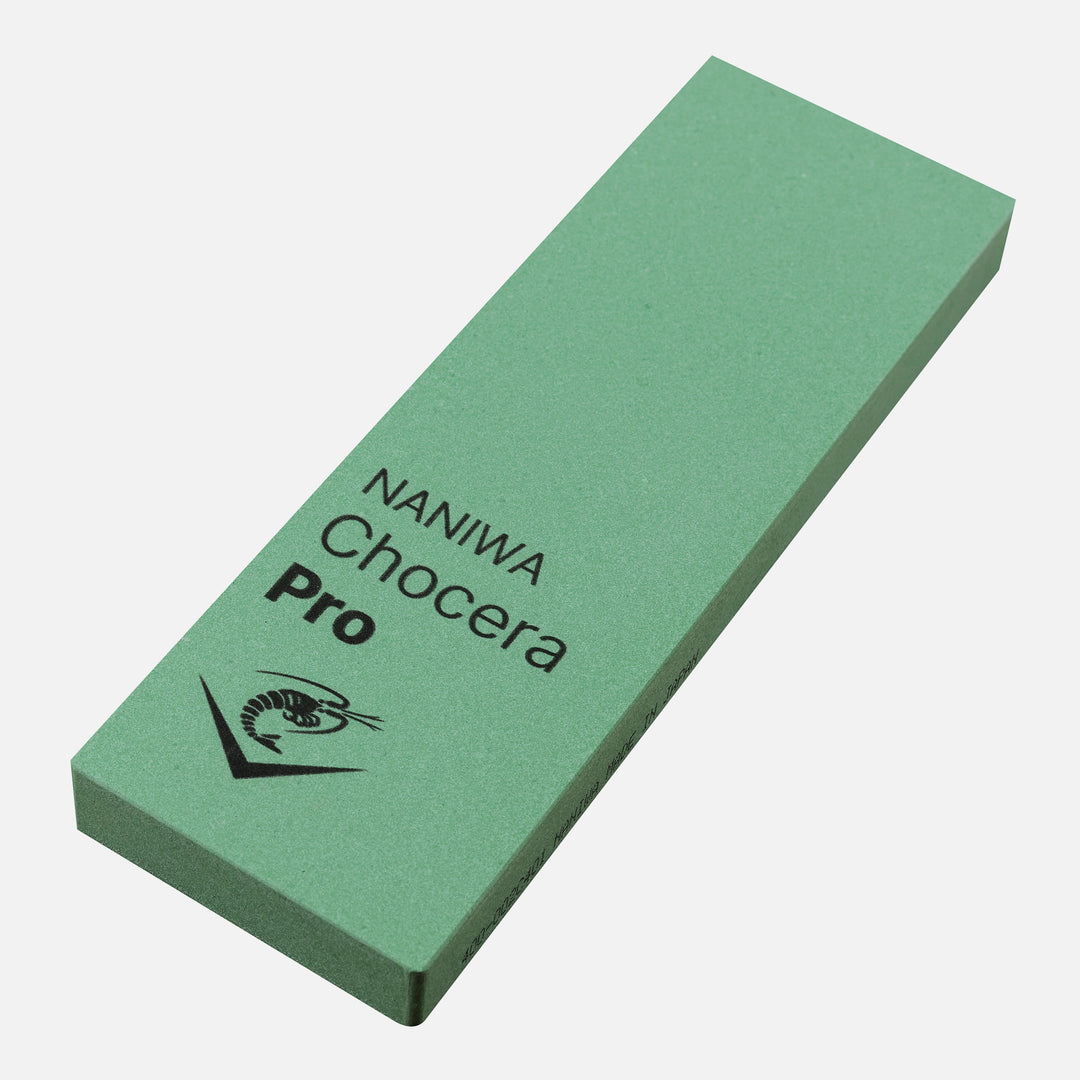
For heavier work we like stones and plates such as Naniwa Chocera Pro #400, Naniwa Diamond #400 or coarse Shapton/Atoma solutions.
What matters is having a reason to use them.
Why starting too coarse can make sharpening worse
A coarse stone removes steel quickly. That is exactly why it becomes risky when the edge only needs routine sharpening.
It is easier to change the blade profile accidentally, overgrind the heel, shorten the tip or create deep scratches that then require extra work on later stones.
If the knife is simply dull and undamaged, 800-1000 grit is normally the better starting point.
Why 800-1000 grit is the most useful sharpening range
This range is fast enough to form a fresh apex on a normal dull edge but refined enough to leave a completely usable kitchen finish.
It is also a great place to learn. Angle control, burr formation, pressure and deburring are all easy to understand without every mistake removing a large amount of steel.
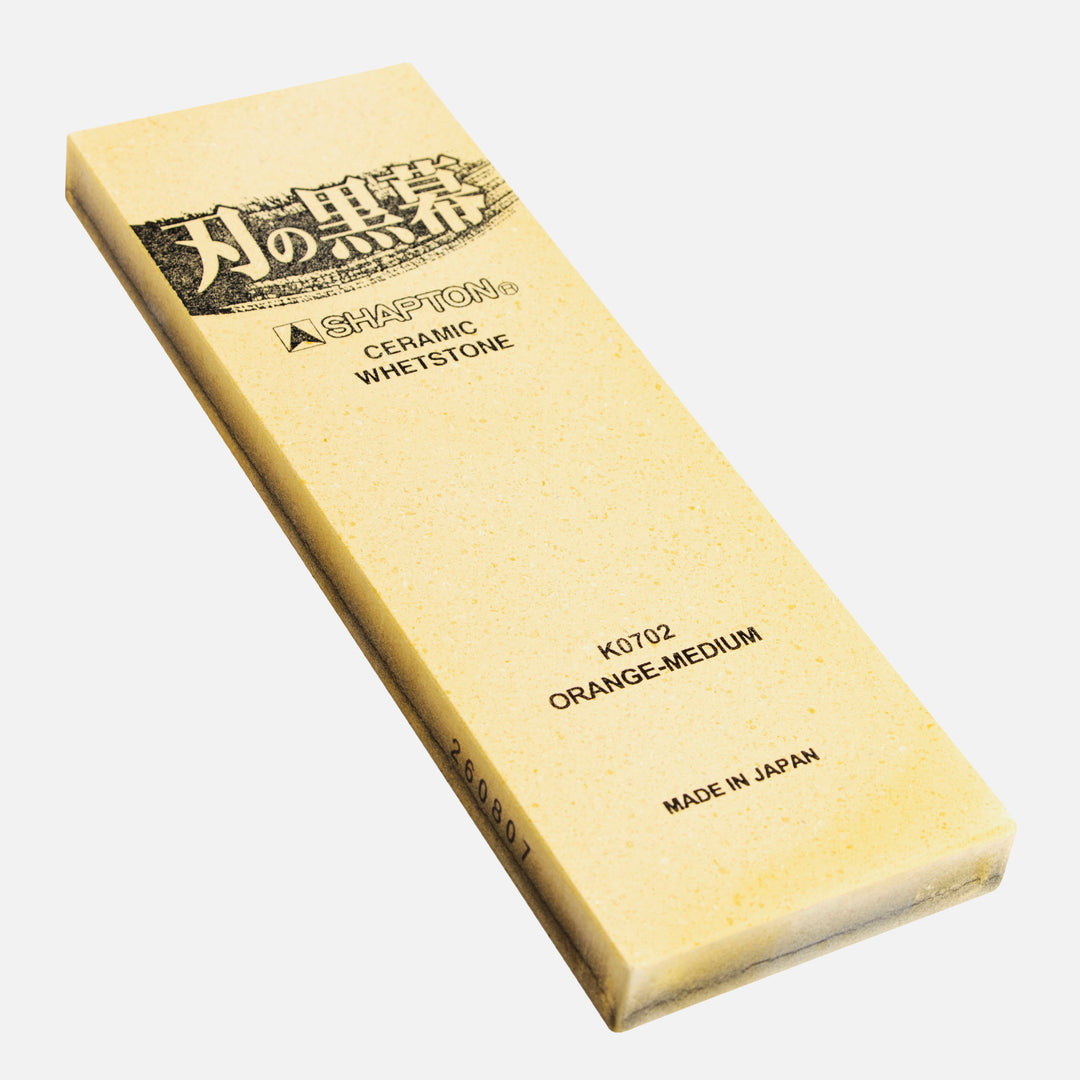
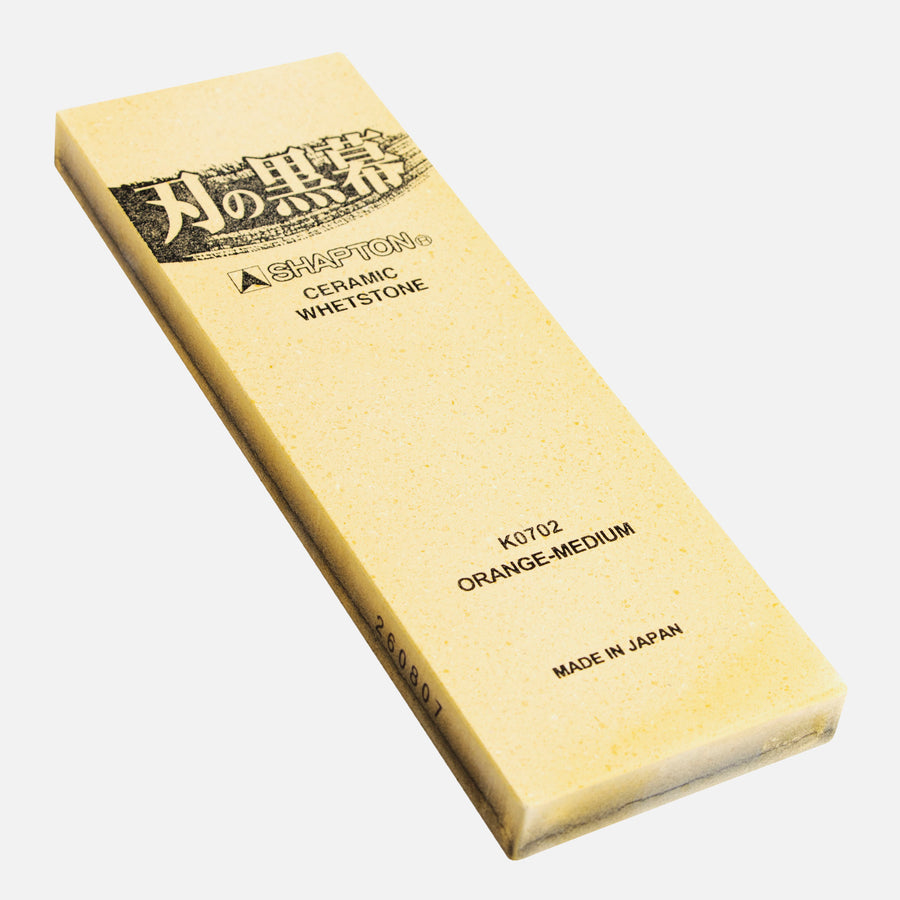
Shapton Kuromaku #1000 is the straightforward one-stone recommendation. Naniwa Chocera Pro #1000 is a more premium alternative with a different feel on the blade.
Naniwa Chocera #800 sits in the same general working range but cuts slightly faster. We particularly like it when somebody wants a medium one-stone solution with very clear sharpening feedback.

Can one 1000 grit stone really be enough?
Yes. For most normal home sharpening, one good 1000 grit stone can rebuild the edge and leave more than enough bite for vegetables, meat and general preparation.
The owner still needs a flat working surface and enough patience to form and remove the burr properly. Deep chips will also be slow to repair on 1000 grit.
But one good stone used well is far more valuable than a large progression used without understanding the apex.
Combination stone or separate stones?
Combination stones such as 1000/3000 or 1000/6000 can be practical and compact. They make particular sense if you genuinely expect to use both sides regularly.
For many home users, however, the medium side will do most of the work while the high-grit side is used much less frequently. This is why we often prefer putting the budget into one good medium stone first.
Around 3000 grit creates an excellent usable finish. But many cooks can stop at 1000 and enjoy the slightly toothier edge indefinitely.
What does 2000-3000 grit actually change?
After a good 1000 grit edge, this range reduces the scratch pattern, smooths the cutting feel and can make final burr removal easier while retaining enough bite for normal kitchen work.
This is one of our favourite finishing ranges. Shapton Kuromaku #2000, Imanishi Aoto #2000 and Naniwa Advance/Chocera around #3000 all represent slightly different approaches to the same broad goal.
For a general Gyuto or Santoku, a crisp 2000-3000 grit edge is often more useful than a highly polished mirror edge.


When does 5000-6000 grit make sense?
This range becomes more attractive for slicers, fish knives and users who value a smoother draw cut and a cleaner surface on meat or fish.
It can also work beautifully on fine-grained carbon steels when the intended task benefits from greater refinement.
For a general Gyuto cutting tomatoes, peppers, onions and mixed ingredients, we often prefer stopping at 2000-3000 instead of polishing away too much of the aggressive bite.
Do you need 8000, 10000 or even 16000 grit?
Usually not.
Very high finishing grits can be useful for selected single-bevel knives, highly refined slicers, specialist polishing or simply because the user enjoys the finish they create.
They are not mandatory stages for every Japanese knife. A highly polished edge may glide through paper and still feel less decisive on tomato skin than a properly finished 2000 grit kitchen edge.
Higher grit does not automatically mean sharper, and sharper on paper does not automatically mean better in food.
Different knives deserve different finishing grits
For a normal Gyuto, we often stop around 2000-3000 because it balances bite and refinement extremely well.
A double-bevel Sujihiki can justify something closer to 5000-6000 when long clean draw cuts are important.
A properly maintained Yanagiba may be finished around 6000-10000 or on a suitable natural finishing stone because the geometry and cutting task are completely different.
The most important stone is not the highest grit
The most important stage is the one that creates a clean, continuous apex.
If the medium-stone work is incomplete, moving to 3000, 6000 or 16000 only polishes an edge that was never formed properly.
A well-executed 1000 or 2000 grit edge can outperform a badly finished 16000 grit edge in every useful kitchen test.
Soaking stones vs splash-and-go stones
Some whetstones need time in water before they work consistently. Others need only water on their surface and can be used almost immediately.
Soaking stones often release more slurry and can feel softer during sharpening. Splash-and-go stones are convenient when you want to set up quickly, sharpen and put everything away without a long preparation stage.
Neither system is inherently better. Always follow the instructions for the exact stone series, not a generic rule based on the brand name or grit.
Do not soak every water stone for a long time
Some binders can soften or degrade after inappropriate prolonged soaking. Damage may not appear until the stone dries later.
That is why splash-and-go products should not be treated like traditional soaking stones simply because both are used with water.
Correct preparation is part of caring for the stone itself.
How should you dry and store a whetstone?
After sharpening, rinse away slurry and steel residue and remove excess surface water. Then allow the stone to dry naturally in the shade at normal room temperature.
Avoid aggressive forced drying, strong heat or direct sun. Let the stone dry gradually before placing it in a closed container for long-term storage.
The routine does not need to be complicated: clean it, let it dry naturally and store it somewhere dry.
Hard stones and soft stones feel very different
Harder stones generally stay flatter for longer and provide crisp feedback about angle control, although some very hard stones can feel glassy and release little slurry.
Softer stones expose fresh abrasive more readily, create more slurry and can be excellent for wide-bevel polishing and kasumi. The trade-off is faster dishing and a greater chance of gouging the stone with the knife tip.
Hardness alone does not determine sharpening speed. The abrasive, abrasive concentration and binder all matter.
What does “feedback” actually mean?
Feedback is the information the stone gives through friction, sound and the way it reacts to water and pressure.
It can tell an experienced sharpener whether the bevel is sitting well, whether a stone has started glazing or whether a particularly hard steel is cutting slowly.
This is also why two stones with similar grit numbers can feel completely different and why personal stone preferences become stronger with experience.
What does slurry do?
Slurry is the mixture of loose abrasive, water and steel particles produced during sharpening.
Depending on the stone and pressure, it can increase cutting, soften the scratch pattern and help create kasumi finishes on wider bevels.
Very dirty slurry can eventually make a stone feel slower or less precise, so during a longer session it can be useful to refresh the surface when necessary.
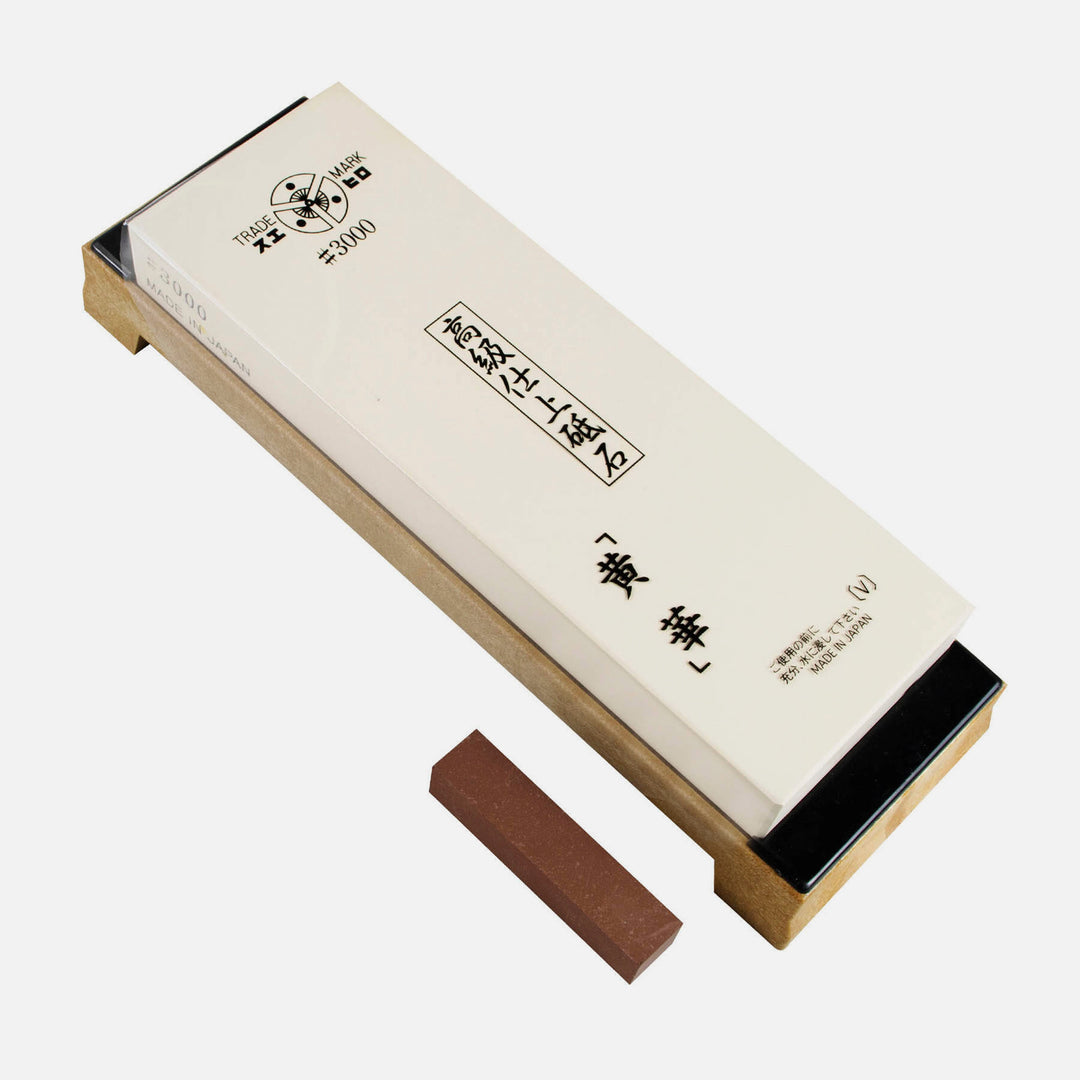
Why synthetic stones are usually easier to learn on
The main benefit of a good synthetic stone is consistency. The abrasive behaviour is predictable, the grit role is reasonably clear and the user does not need to interpret large variations between individual stones.
This makes it easier to understand what coarse, medium and finishing stages are actually doing while you are still learning angle control and burr management.
Synthetic stones are not one single hardness category - some are hard, some much softer - so choose the stone according to the job rather than assuming “synthetic” tells you exactly how it will feel.
Are natural Japanese stones automatically better?
No.
Natural stones vary in hardness, particle behaviour, finish and possible inclusions. In experienced hands they can create beautiful kasumi and distinctive refined edges, but they demand more interpretation from the sharpener.
A synthetic stone is usually more predictable and therefore often the better working tool.
Choose a natural stone for a particular finish or sharpening experience, not because natural automatically means superior.
When do diamond stones or diamond plates make sense?
Diamond abrasives become increasingly useful when ordinary stones cut a wear-resistant steel too slowly, when significant repair is required or when speed matters in workshop work.
They are also excellent for flattening other stones because the working surface remains reliably flat.
SG2 does not automatically need diamond sharpening. A quality synthetic 1000 grit stone can sharpen SG2 perfectly well. Diamond becomes more valuable as steel wear resistance, damage or workload increases.


Diamond abrasives make the most sense when repair speed, very wear-resistant steels or regular flattening justify the extra cutting power.
Flat stones matter more than another polishing stone
Water stones wear where the blade spends the most time. This often creates a shallow hollow through the centre.
A dished stone changes the relationship between knife and abrasive as the blade moves across the surface. That makes consistent bevel geometry much harder and becomes especially problematic when working on wide bevels or single-bevel knives.
Stone flatness is part of sharpening geometry, not just cosmetic maintenance.
How often should a stone be flattened?
Check it every session rather than flattening after an arbitrary number of knives.
A simple method is to draw a pencil grid over the stone. Lap the surface and watch how the marks disappear. Continue until the grid disappears evenly over the whole surface.
A hard medium stone used briefly may need only a small correction. Softer stones or longer polishing sessions may require flattening during the same session.
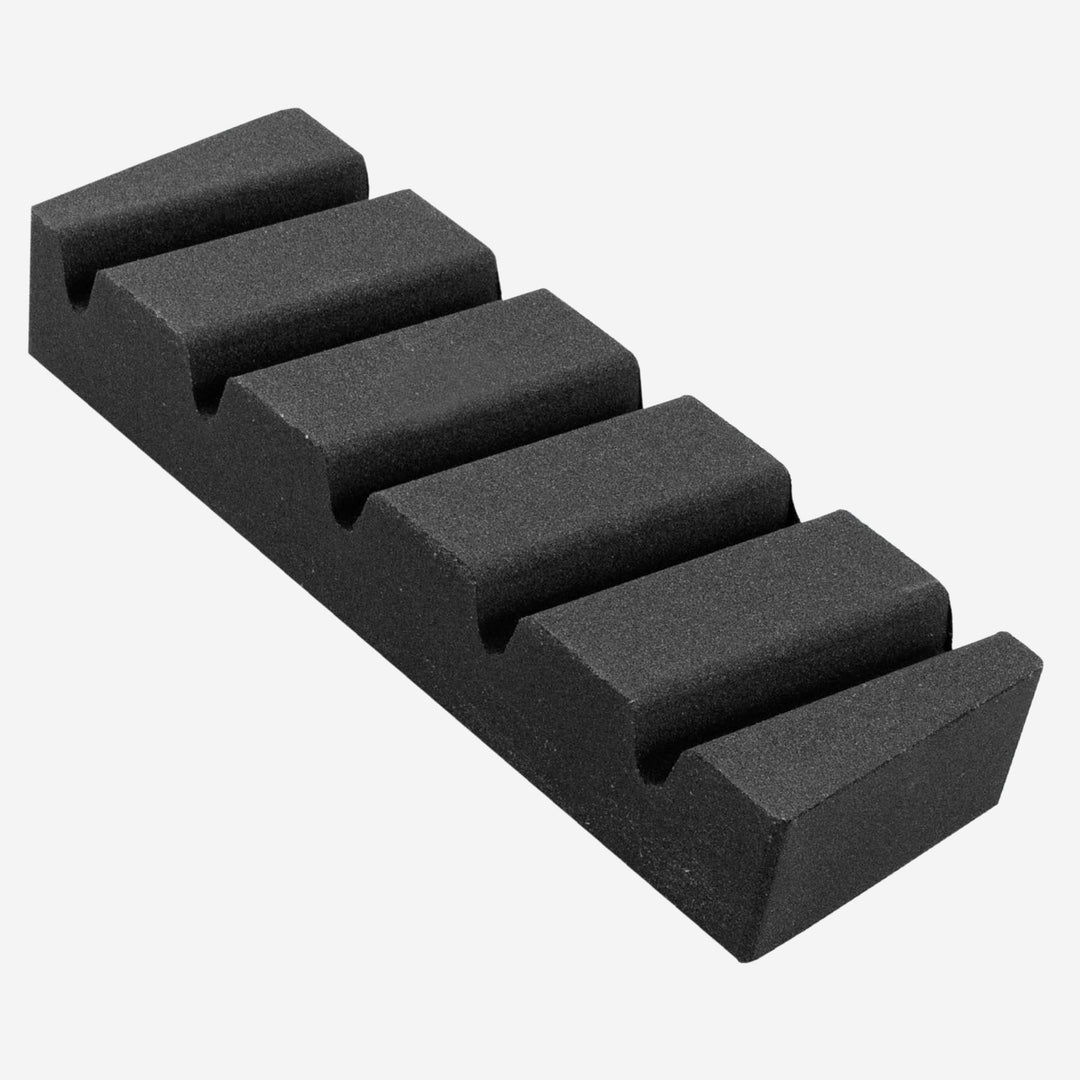
Flattening stone or diamond lapping plate?
A traditional flattening stone is affordable and completely adequate for many home users. The disadvantage is that the flattening tool itself also wears and eventually needs attention.
A quality diamond plate cuts faster, remains much flatter and is easy to rinse. The initial price is higher and the diamond layer is not permanent, but the convenience becomes increasingly useful when several stones require frequent maintenance.
For occasional home sharpening, a normal flattening stone may be all you need. For a larger collection or workshop use, a good diamond plate can save a significant amount of time.
Is a stone holder necessary?
The stone must be stable, but that does not mean every beginner needs to buy a dedicated holder immediately.
A damp towel, non-slip surface or a case designed to act as a base can work well. The Shapton Kuromaku case is one example of a simple built-in solution.
An adjustable holder becomes more useful when several stones have different sizes or when a higher working position simply makes sharpening more comfortable.
When does a sink bridge become useful?
A sink bridge is particularly useful for long sessions, muddy polishing and workshop work where water and abrasive residue would otherwise cover the counter.
It provides a stable platform over the sink and keeps rinsing close to the sharpening area.
For a quick splash-and-go touch-up on one stone it may be unnecessary. When multiple stones and several knives are involved, the convenience becomes much easier to appreciate.
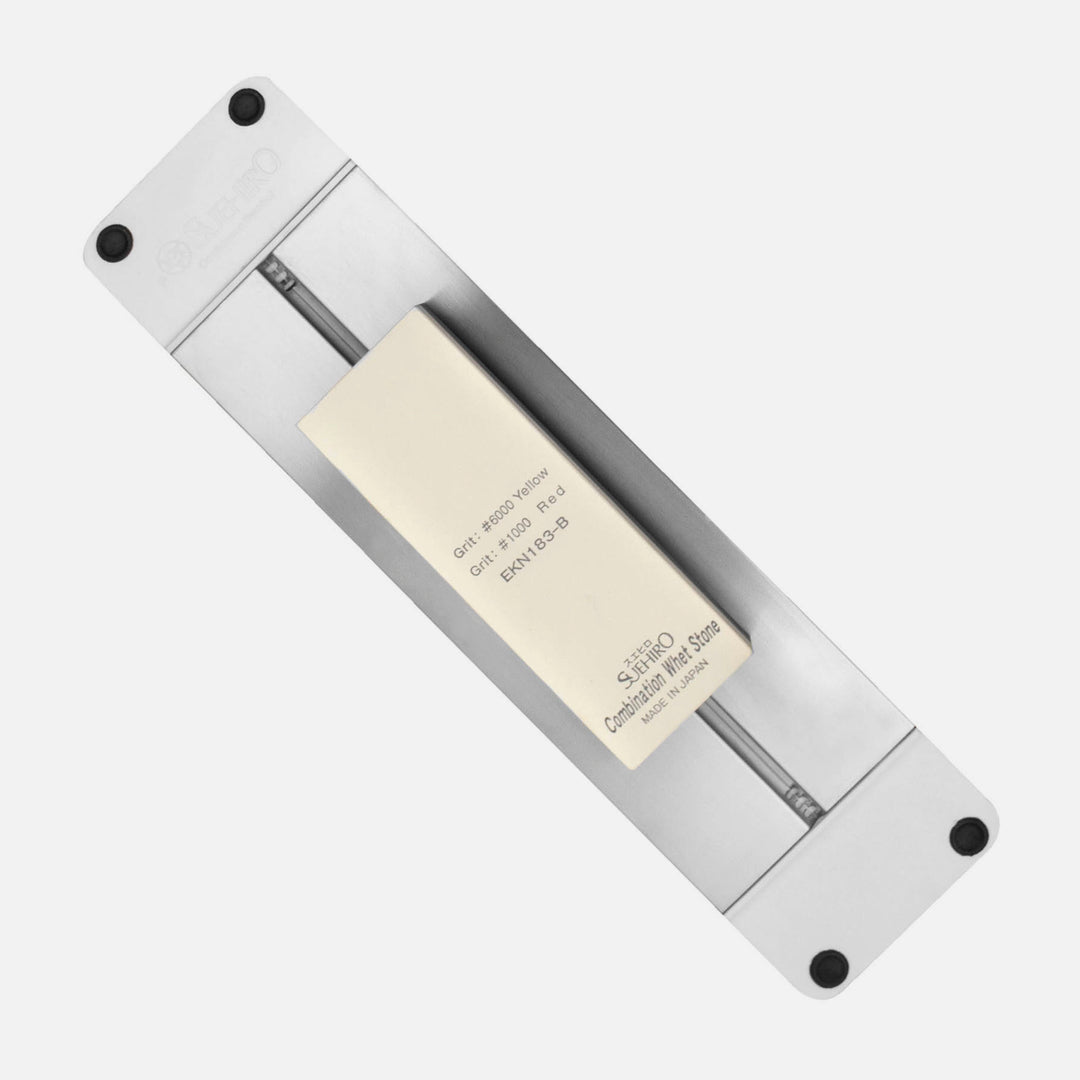
What is a nagura stone actually for?
The name “nagura” is used for several different types of small stones, which can be confusing.
Depending on the product, a nagura may clean or dress another stone, raise slurry or deliberately change the finishing action of the main abrasive.
A synthetic cleaning nagura, a slurry stone and a natural nagura should not automatically be treated as the same accessory simply because they share a name.
You can compare these tools alongside flattening stones, honing rods and holders in our sharpening accessories section.
What does a leather strop actually do?
A leather strop works best on an edge that has already been sharpened properly.
It can remove small remaining burr fragments, refine the apex and make light maintenance between stone sessions quicker. Loaded with fine abrasive compound, it also polishes the very edge.
One finish we particularly like is a leather strop with roughly 1 micron diamond compound after the stone progression.
Keep the pressure light. Too much pressure or an excessively high angle can round the apex instead of improving it.

Can stropping hide sharpening mistakes?
Yes. A soft strop used with too much pressure can convex and round the edge. Compound can also make a weak wire edge feel extremely sharp for a short time without fixing the underlying problem.
That is why the burr should already be largely controlled on the stone before you reach for leather.
Use the strop as a final check and refinement step, not as a repair tool.
Angle guides: useful or a bad habit?
Clip-on angle guides can give a complete beginner some initial reference, but we generally prefer not to depend on them.
One problem appears near the tip, where the geometry changes and a fixed guide does not automatically preserve the correct contact relationship.
A marker on the bevel gives more useful information because it teaches the user to read the existing knife geometry instead of simply following a plastic angle reference.
How should a beginner choose a sharpening angle?
Start by following the bevel already present on the knife instead of obsessing over whether the number is exactly 12°, 15° or 17°.
Colour the bevel with a permanent marker, make a few light passes and inspect where the ink disappears. Adjust until the abrasive is reaching the full bevel and actually working at the apex.
A lower angle generally improves cutting efficiency but leaves less support behind the edge. A slightly higher angle can create more durability.
The goal is a stable edge that matches the knife and its work.
Angle consistency matters more than the exact number
A consistent 15° edge will usually perform better than an intended 12° edge that changes continuously from heel to tip.
An unstable angle widens and rounds the bevel, wastes steel and makes burr formation difficult to interpret.
Exact-angle gadgets are easy to sell because they give the buyer a number to chase. They do not solve inconsistent movement, incomplete apex formation or poor burr removal.
Pressure should decrease as sharpening progresses
During the first stage, use enough controlled pressure for the stone to cut efficiently while keeping the bevel stable. There is no need to press excessively hard.
As the burr becomes continuous, begin reducing pressure. The final alternating strokes should become extremely light - often close to the weight of the knife itself.
Progressively lighter pressure is one of the most underrated sharpening habits. It prevents the final strokes from simply rebuilding the burr you are trying to remove.
What is a burr and why does it matter?
A burr is a thin lip of steel pushed to the opposite side after one bevel has been ground far enough for the two sides to meet at the apex.
Its value is diagnostic. It tells you that the sharpening work actually reached the edge rather than merely polishing steel above it.
The burr itself is not the goal. It is evidence that you have reached the apex and must now be reduced and removed.
How can you check whether the burr runs along the whole edge?
Dry the blade carefully and move a fingertip gently from the spine toward the edge - never along the cutting edge.
Check the heel, middle and tip independently on the side opposite the one you were sharpening.
If one section has not produced a burr, that section needs more work. Concentrate there without creating an abrupt change in edge geometry.
How should you deburr without leaving a wire edge?
Reduce the pressure and use alternating passes on a clean, flat stone until the burr becomes smaller and no longer flips dramatically from side to side.
A few extremely light trailing strokes or careful stropping can finish the process, but they should complement rather than replace proper stone work.
A wire edge can feel spectacularly sharp during the first test and then collapse very quickly. Paper, food and even a paper towel can help reveal a weak section that was not deburred properly.
Why counting identical strokes is not enough
Edge wear is rarely perfectly equal from heel to tip or from one side to the other.
Ten strokes may already reach the apex in one section while another part of the knife has barely changed.
Burr formation, scratch pattern, marker removal and cutting performance tell you where the actual work is needed. Counting can help organise practice, but it should not override the evidence on the blade.
The five most common whetstone mistakes
1. Changing the angle during the stroke, particularly near the tip.
2. Using too much pressure, which reduces control and accelerates stone wear.
3. Moving to the next grit before a continuous apex has formed.
4. Leaving a wire burr because the finishing passes remain too heavy.
5. Sharpening on a dished, glazed or unstable stone. Most disappointing beginner edges come from these fundamentals rather than from buying the wrong brand.
When should you stop and use professional sharpening?
Routine dullness is an excellent place to learn freehand sharpening. Major geometry work is different.
Deep chips, a broken tip, severe thinning, major profile correction and damaged single-bevel ura or shinogi geometry can turn a practice session into an expensive mistake.
If you are uncertain how much steel needs to be removed, use our professional sharpening service rather than experimenting on an expensive blade.
How do you know when a knife needs thinning?
A knife can have a sharp apex and still cut badly through thick food.
Repeated sharpening gradually moves the cutting edge higher into thicker parts of the blade. Eventually the knife starts wedging even though the very edge itself remains sharp.
Carrots and potatoes make this easy to recognise. If the knife used to pass through them cleanly but now begins cracking or forcing them apart after a fresh sharpening, the blade may need thinning behind the edge rather than another normal apex sharpening.
Thinning removes considerably more steel and changes the geometry of the blade. If you are not comfortable with that work, leave it to a professional.
Yanagiba, Deba and Usuba require a different approach
Traditional single-bevel knives should not simply be sharpened like double-bevel Gyuto.
The goal is to preserve the original wide bevel, shinogi line and hollow ura geometry. Work slowly and evenly on the wide bevel instead of casually changing its angle.
The ura side should receive controlled work with lighter pressure and usually finer abrasives. Removing too much material from the back can damage geometry that is difficult to restore.
If the ura, shinogi or broad bevel is already damaged, professional sharpening is much safer than using an expensive single-bevel knife as the first experiment.
What is the minimum sharpening setup for one good Japanese knife?
Start with one reliable 800-1000 grit stone, a stable base and a method for keeping the stone flat.
Add a strop if you want a convenient maintenance and finishing step, but only after you understand burr removal on the stone itself.
We would rather see one Shapton Kuromaku #1000 used correctly than six stones with poor angle control and no flattening.
If you can buy only one stone
Shapton Kuromaku #1000 remains the straightforward recommendation. It is quick to prepare and capable of creating a complete general-purpose kitchen edge by itself.
If you can spend more and value a different sharpening feel, Naniwa Chocera #800 or Chocera Pro #1000 are excellent alternatives. The Chocera 800 in particular is one of our favourite fast one-stone options because of its cutting speed and feedback.
If you can buy two stones
One very useful pair is approximately 800 + 3000.
The 800 stage removes enough steel to handle a dull working edge efficiently. The 3000 finish then refines the scratch pattern while retaining the bite that works well in most kitchens.
This setup expands capability without creating several tightly spaced stones that all do almost the same job.
If you can buy three stones
A conventional general-purpose progression is:
400 for repair and bevel setting.
800-1000 for normal apex formation.
3000 for refinement.
A Naniwa-based example would be Chocera Pro #400, Chocera #800/1000 and Chocera Pro #3000.


Beginner kit: the minimum complete setup
1. Shapton Kuromaku #1000
The main stone. It teaches angle control, apex formation and burr removal while leaving a practical working edge.
2. Naniwa #220 flattening stone
Keeping the working surface flat is more important than immediately buying a 6000 or 8000 grit finisher.
3. Leather strop
Optional at first, but useful for light maintenance and final refinement once you can already deburr correctly on the stone.


Enthusiast kit: every item should add a new capability
An enthusiast does not need every grit either. The larger kit should solve more types of work.
A very useful configuration is Naniwa Chocera Pro #400 for repair and fast bevel work, Chocera #1000 for normal sharpening and Suehiro Ouka #3000 when a muddier finish, wide-bevel polishing or kasumi work is desired.
Add a reliable flattening system such as Atoma #140 or another lapping solution, plus a leather strop with a fine compound for light final refinement.
The Ouka is not there merely because “3000 comes after 1000”. It provides a different surface behaviour and polishing capability.
Professional and workshop setup: speed and variety matter
A workshop kit solves a different set of problems. It needs to handle heavily damaged edges, thinning, hard steels, rapid flattening and several different finishing requirements efficiently.
For heavy work, Atoma #140 or a very coarse Shapton can cover fast material removal and lapping. Naniwa Chocera Pro #400 then provides controlled repair and bevel setting, followed by Chocera #1000 for the normal sharpening stage.
Naniwa Diamond #400 and #1000 are useful options when abrasion-resistant alloys and time efficiency justify diamond abrasives.
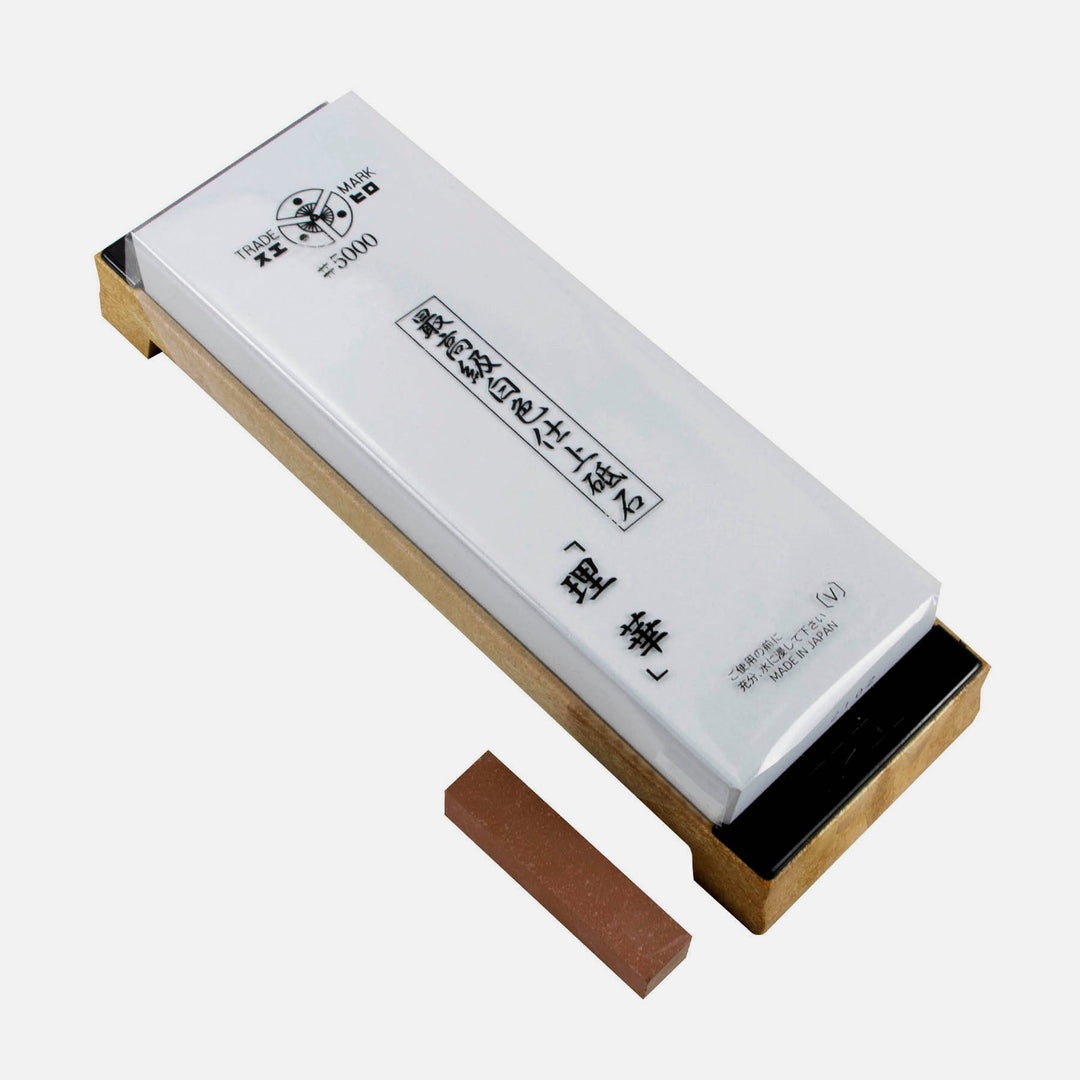
For practical finishes, 2000-3000 grit covers a huge amount of normal kitchen work. Suehiro Rika #5000 becomes useful on refined slicers, while something around 8000 can be reserved for selected single-bevel knives or polishing work.
A workshop progression grows because each abrasive solves a different problem - not because every grit number between 120 and 10000 needs to be represented.


Our favourite compact progression
With experience, we became less interested in long, tightly spaced progressions and much more interested in choosing the first stone correctly.
One setup we particularly like is:
Naniwa Chocera #400 → Shapton Kuromaku #2000 → leather strop with approximately 1 micron diamond compound.
The Chocera removes enough steel to reset a tired edge without automatically dropping to an extremely coarse repair stone. Kuromaku #2000 leaves the kind of refined but still aggressive kitchen edge we like, and a few light passes on the strop complete the session without turning sharpening into a ritual.
Once the apex is clean and the scratch pattern is controlled, relatively large jumps between grits can work extremely well.
What stones do we actually like using?
For very heavy work, Atoma #140 and coarse Shapton/RockStar stones are useful because they remove material quickly and make repair or bevel-setting much faster.
For normal sharpening, Naniwa Chocera #800, Chocera #1000 and Shapton Kuromaku #1000 cover a huge amount of day-to-day work. The Chocera #800 is particularly attractive as a fast one-stone solution, while the Kuromaku #1000 remains one of the simplest complete recommendations.
For practical finishes, Shapton Kuromaku #2000 and Imanishi Aoto #2000 are among our favourites. Naniwa Advance #3000 adds more refinement when that is what we want.
For kasumi and wide-bevel work, Naniwa Traditional #1500 and Suehiro Ouka #3000 can be much more interesting than simply reaching for an increasingly high grit number.
Our favourite compact setup remains Chocera #400 → Kuromaku #2000 → light 1 micron diamond strop.
Our personal TOP 3 sharpening stones
1. Shapton Kuromaku #1000. The one-stone answer. Predictable, practical and capable of creating a complete kitchen edge without another finishing stone.
2. Naniwa Chocera #800. A faster medium stone with excellent feedback and enough cutting speed to make a dull working knife efficient to sharpen.
3. Naniwa Traditional #1500. A personal favourite when the work moves toward kasumi and a different surface feel rather than simply maximum edge polish.
Honourable mention: Imanishi Aoto #2000. A muddy, natural-feeling middle finish that can be very enjoyable when you want something different from a hard splash-and-go stone.
This is a preference list, not an objective ranking. The best stone depends on what you are sharpening and what finish you want.
What changed most with experience?
We became less interested in building long, perfectly spaced grit ladders.
The quality of the first useful stone and the quality of the apex matter much more. Once the edge is properly formed and deburred, wide grit jumps can work extremely well.
We also stop lower more often. A crisp 2000-3000 grit kitchen edge is usually more useful in daily cooking than automatically polishing every knife to 8000 or 16000 grit.
The biggest sharpening myth: higher grit means a better edge
A high grit number is easy to market because it looks measurable. It creates the impression that a 16000 grit edge must somehow be sixteen times better than a 1000 grit edge.
That is not how sharpening works.
Sharpness begins with reaching the apex completely and removing the burr cleanly. A poorly apexed knife does not become good because it is moved across an expensive polishing stone.
For a general-purpose kitchen knife, excessive polish can even remove some of the bite that makes the edge feel so effective on tomato skin and similar food.
What is over-marketed in sharpening?
Very high-grit finishing and exact-angle gadgets receive more attention than they deserve.
Both give the buyer a clear number to chase, but neither fixes incomplete apexing, poor burr removal, changing pressure or a dished stone.
The quality of basic work in roughly the 1000-3000 range usually matters far more.
What is underrated?
Flat stones and progressively lighter pressure.
A flat stone gives you a predictable surface against which the angle and bevel can actually be read.
Lighter finishing pressure reduces the burr instead of constantly recreating it.
Both habits improve almost every knife you sharpen and cost less than buying another polishing stone.
A real one-stone example
Imagine a working knife that is very dull but has no chips, no broken tip and no major geometry problem.
Starting on a 6000 grit stone would waste time because steel removal is too slow. Starting on 220 or 320 would remove far more metal than the job requires.
A Shapton Kuromaku #1000 or Naniwa Chocera #1000 can simply rebuild the edge. Reduce pressure progressively, deburr properly and, if desired, finish with a few very light passes on a fine strop.
That is exactly the kind of job where one good stone is a complete sharpening system.
Who should not build a large freehand stone system?
A large whetstone collection is a poor fit for someone who does not want to practise, flatten stones or deal with water and cleanup.
That person may be happier with a simple guided system or professional sharpening.
We would also steer a complete beginner away from buying expensive high-grit finishing stones before they can form and remove a burr cleanly on one medium stone.
The sharpening kit should grow with the user's skill and the problems they actually encounter.
What matters more than buying another stone?
A flat working surface.
A consistent angle.
Reaching the apex completely.
Understanding the burr.
Reducing pressure as the edge becomes finished.
Knowing when to stop.
FAQ - Japanese knife sharpening stones and accessories
1. What grit whetstone should I buy first?
For an ordinarily dull Japanese kitchen knife, around 800-1000 grit is the most useful starting point. It removes steel fast enough to form a fresh apex while leaving a complete working edge.
2. Can one 1000 grit stone be enough?
Yes. One good 1000 grit stone can handle most routine home sharpening. Deep damage requires something coarser, but a properly sharpened 1000 grit edge is already an excellent general kitchen edge.
3. Do I need a 6000 grit stone?
Only if the knife and task benefit from a smoother, more polished finish. Most general-purpose Gyuto and Santoku knives do not need 6000 grit to perform extremely well.
4. Do I need a flattening stone?
You need a reliable flattening method. Water stones become dished with use, and sharpening on a concave surface makes consistent geometry more difficult. A flattening stone or suitable diamond plate solves the problem.
5. Can I sharpen SG2 on a normal 1000 grit stone?
Yes. SG2 does not automatically require diamond abrasives. A good synthetic 1000 grit stone can sharpen SG2 effectively, although wear-resistant steels may require more time and careful burr control.
6. How often should I sharpen my Japanese knife?
Sharpen when cutting performance has clearly dropped and a light maintenance step no longer restores the edge. The interval depends on steel, cutting board, geometry, technique and cutting volume rather than a fixed date.
7. Should I soak my whetstone?
Follow the instructions for the exact stone series. Some stones need soaking, while splash-and-go stones only need water on the surface and should not be treated like long-soak stones.
8. How should I dry a whetstone?
Rinse it, remove excess water and let it dry naturally at room temperature away from direct sunlight or strong heat. Do not seal a wet stone in a closed container for long-term storage.
9. Do I need a leather strop?
No, but it is useful for light maintenance and final burr cleanup once you can already sharpen properly on a stone. A strop should refine good stone work rather than hide poor sharpening.
10. Should I use a ceramic honing rod on a Japanese knife?
A fine ceramic rod can be useful for careful light maintenance. We generally prefer starting with a strop for a slightly tired edge and moving to a rod when more refreshment is required. Neither replaces a whetstone when the knife is truly dull.
11. Are combination stones good for beginners?
They can be, but many beginners use the medium side far more often than the polishing side. One high-quality 800-1000 grit stone is often a better first purchase than a combination stone with a finishing grit you rarely need.
12. Are sharpening angle guides worth using?
They can provide a rough initial reference, but fixed guides do not follow every part of the blade equally well, especially near the tip. Learning to read the existing bevel with a marker generally builds better freehand habits.
13. How do I know if my knife needs thinning?
If the apex is sharp but the knife starts wedging or cracking carrots and potatoes apart instead of passing through them cleanly, repeated sharpening may have moved the edge into thicker steel and thinning may be required.
14. Can I sharpen Yanagiba, Deba or Usuba like a normal Gyuto?
No. Traditional single-bevel knives require preservation of the wide bevel, shinogi and ura geometry. Work slowly and use light, controlled work on the ura side; serious geometry damage is better handled by an experienced sharpener.
15. Is a diamond stone necessary for hard Japanese steel?
Not automatically. Good synthetic stones can sharpen steels such as SG2 effectively. Diamond abrasives become more valuable when speed, heavy damage, very wear-resistant alloys or regular workshop use justify them.
Building your sharpening setup?
Start with the problem you actually need to solve, not with the largest possible progression.
Browse all Japanese knife sharpening equipment, compare individual sharpening stones, or explore flattening stones, strops, nagura, honing rods and stone holders.
If the knife has deep chips, a broken tip, serious thinning problems or damaged single-bevel geometry, use our professional sharpening service instead of removing large amounts of steel by trial and error.
Or return to the full Japan Knives range and build the maintenance system around the knives you actually use.